Journey Steps are bubbles that explain step-by-step a specific process. They are either connected to a specific page element (Callouts) or they appear as modal windows that are not attached to any element on the page (Dialogs, Panels).
Creating a step
Every Journey usually consists of multiple steps. Keep in mind that all of them need to be attached to a specific element of the underlying application in order to properly be displayed.
You can add a Step in two ways:
Click on the Callout/Dialog/Panel button in the sidebar to insert the first step of the Journey (it depends on which type of step you want to insert) or click Add new Step button:
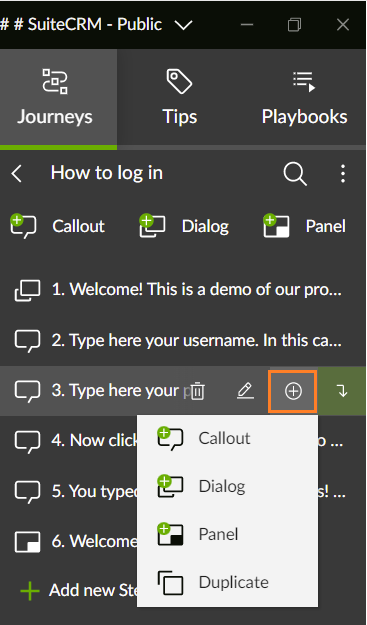
Click Add new Step button in case you want to insert the new step at the end of the Journey:

Anchoring a step
After clicking on the Add Step button, a rectangle shaped selector will appear at the mouse position. It will let you choose the element that the newly created step will be anchored to. Hover over page elements to see their reliability and left-click when you have chosen.
To know more about step element detection and reliability, please check this article.
If you want to know more about inline editing or the general editing process, please check this article.
To know more about step element detection and reliability, please check this article.

Editing a step
Now that you have created a step, you can start editing it by directly clicking on the bubble (inline editing) or opening the step editor.If you want to know more about inline editing or the general editing process, please check this article.
Was this article helpful?
That’s Great!
Thank you for your feedback
Sorry! We couldn't be helpful
Thank you for your feedback
Feedback sent
We appreciate your effort and will try to fix the article